Introduction
Whether for hobby use, as a development platform / testbed / sandbox, or for live hosting, a server lab or home server allows you to create a setup specific to your needs. Since the requirements for that server lab can vary widely, so might the hardware and software used to create it. A home server can be as simple as a single computer or even a single virtual machine used to host some videos or files that are shared on your home network, up to a full scale server farm hosting live websites or more. Most will fall someplace in between those two points though and can share many things in common. For our example, the goal is to end up with a server lab that can host a variety of virtual machines and provide applications for both local and internet use. This guide does expect that you have some level of comfort with computer hardware and software, our intention is to provide a basic guide on assembling a functional small scale server lab.
Your ISP
Before we move on to building a system though, lets look at the internet connection and service provider in use. If you plan to connect with the outside world for more than just some quick file transfers, things like speed and monthly bandwidth limits may come in to play. Another thing to consider is that unless you are set up with a static IP (something you would probably know because it costs more and is sometimes not even offered for residential accounts), you will need a method to update your dynamic IP when it changes. Additionally, some providers do not like home users hosting websites and most do block the standard mail server ports. While it is not nearly as common for them to block other services, it would be a problem if they do.
Your Connection
Now that you have verified enough speed and bandwidth are available for your needs and that your provider does not block services, let’s look at your connection hardware. This is the modem and/or router your provider normally gives you, but is also a key part of your setup, especially if you plan to make your applications available on the internet. Most times you pay a monthly fee to rent the device or devices, so upgrading to something you own may be worth looking at as part of the project. Unless you are more comfortable continuing to use the wireless / router capabilities of the hardware your ISP gave you, I would look at either converting that router to gateway mode, or trying to set yourself up with a dedicated modem.
Cable providers are more likely to offer integrated devices, where the modem, router and wireless are one unit. This may seem convenient, but usually results in a device that might lack the features you need for a more complex network. Fiber internet more often already has a separate modem and router, making it easier to keep the modem and use your own hardware from that point. Regardless of the method used, you want to end up with a WAN port that provides unrestricted internet to your system.
Hardware Considerations
As mentioned, a server could be as simple as one computer, but most times your lab will consist of at least a few pieces of hardware. The configuration we use for our guide consists of four computers and at least one switch. Of course your final setup will likely also include other hardware such as wireless access, additional switches, plus the computers and devices in your home that already connect to the local network and internet. The computers used can vary in price and configuration also, based on the tasks they are expected to perform. Since we will create a small server cluster for a virtualization environment, having as much memory and CPU power available as you can for the main workhorse machines is your goal. In our example two of the machines are ‘servers’, one is the firewall and another is a dedicated backup server.
You will need to determine how much power is enough for your needs, but a good starting point for the two servers would be at least 64G of memory and as much CPU as you can afford. You can often get commercial servers that are a couple generations old for a fair price if on a budget. The other two machines can be a scaled back, with 16 or maybe even 8GB being enough memory and a CPU based on what that machine needs to do. In our case the backup server may not need to be extremely powerful, but since we are going to virtualize the firewall, we want enough power for additional applications we might include. You also need to think about where this equipment will go and that you need to have enough power in a battery backup / uninterruptable power supply setup to safely shut down in the event of power loss and handle short term power problems.
Storage Considerations
I separated this from hardware because there is a bit more involved when planning out storage / drive requirements. You can just plop a good sized drive in each machine and go, so long as you make sure to keep everything safely backed up. However, each machine will probably have different drive requirements based on the applications you run and countless other factors, making it difficult to discuss every option you have. We will suggest a viable setup for each machine, and you can always change this later, but starting off with a pretty good idea what you need is better than throwing something together that you have to reconfigure right away.
I didn’t want to get ahead of myself and start talking too much about backups now since we have a section on that later, but a primary factor that should be worked out now is what and how things get backed up. In an ideal situation, you would back everything up every day and then push a copy of those backups to off-site storage, and we do cover that aspect of it in more detail later. For now though, you could identify things that might become too large or that we want to handle in a different way. Examples of this would be storage for your NAS, security video or other datasets that can be expected to become very large. Again, the safest bet is to have a daily off-site backup for everything, but using a portable drive or modifying the schedule, configuration or backup method for large stores of data are all options to make sure your daily backups are quick and efficient.
Another solution for large storage pools is to use a disc array of some type, there are several software and hardware solutions to create disc mirroring. This sounds like a backup since the design of an array is that a disc can fail without losing data – you simply replace the bad disc and rebuild the array without losing data or even needing to take the machine offline in many cases. However, you need to be aware that disc mirroring is not a backup at all, it is redundancy; if a file becomes corrupt, a virus is introduced or an attack takes place, every disc change is immediately replicated on the array with no way of going back to what you had before. Knowing that, you may still decide that for large pools, an array may be an acceptable trade-off verses daily backups for huge amounts of data, especially if syncing with a remote storage location.
Software Information
I just want to touch on the fact that almost everything we are discussing can be accomplished using countless combinations of software. Certainly when selecting software, personal preference is often as much of a consideration as functionality. In this guide we suggest software that we know works because we have used it ourselves, it can also be legally downloaded and used at no cost, but the basic principles are generally the same if you choose different software than we discuss in our guide.
Virtualization
We have mentioned virtualization, but here is a quick explanation of what that means in our case. Virtualization software allows us to set up an environment where we can create multiple ‘virtual computers’, usually called VM’s (virtual machines). Each VM we create ends up acting like a stand-alone computer that we can load an operating system and software on, this is very convenient and in many ways is also the primary function of the server lab. Virtualization software provides the means to create, host, backup and administer these VM’s. Many versions of virtualization software are available, but we have tested several and found ProxMox VE to be the best for our needs because it is easy to install, is administered through a web GUI, has a lot of online support and allows us to create server clusters. A cluster is 2 or more physical machines tied together by the hypervisor (virtualization software) so they act and can be controlled as one unit.
Network Considerations
Before we start loading software it is a good idea to have a basic idea how you plan to map out the network. The two recommended LAN IP layouts are the 192.168.x.x network and the 10.x.x.x network. The 192.168 setup is intended for home use and actually provides plenty of subnet / address capability for most situations; even so, we prefer using the 10. IP setup.
When we say network mapping, we are talking about how you plan to set the IP addresses of network devices. When using the ISP provided hardware you often just plug in a device or connect to wireless, the router then assigns an IP address using the DHCP service and you never really notice this is taking place. You can still have your own DHCP service running once everything is set up, but most of the hardware in your server lab, including our VM’s, will have a static IP address assigned so you can use those addresses when setting up a web server or many of the other possible machines and applications later.
To get started, you could decide the primary network devices will use the configuration 10.0.0.x and that your firewall will have the LAN port set with an IP address of 10.0.0.1 and the subnet will be 255.0.0.0 or /8. You will also need to decide on the IP address configuration the ProxMox cluster, for simplicity you can use 10.0.10.x for that.
Firewall/Router
As mentioned in the connection discussion, there are plenty of options for a firewall/router, you can stick with your ISP provided hardware, buy something better, or build your own, which is what we will do here because it allows us a lot more flexibility and control. With that said, the next step is to prepare the hardware you intend to use as the firewall. This machine must have at least 2 networks cards, I would suggest good quality cards because all data to and from the internet passes through these cards, so skimping here can affect the performance of your entire network. A good option, especially if you plan to place this in the same location as your current internet connection hardware, is something in a quiet, compact case. A modern i3 or comparable CPU, perhaps 16G of memory and a modest SSD (250~500GB) should work well here.
For the installation of software I will provide the URL to more in depth installation and configuration information, usually on the software authors website or to a known good walkthrough. It is beyond the scope of this guide to offer step by step instructions on the software installations, this method should also insure you are getting the most recent software and information, and this guide can be kept a bit shorter.
Keep your IP / network configuration notes nearby because you will probably need to substitute your configuration in place of what is being used in the various instructions. If you use our suggestions, the first ProxMox node will use IP 10.0.10.1 and the subnet will be 255.0.0.0 or /8. Another thing to keep in mind as you configure the new firewall is making sure not to set up an IP conflict that will cause a loss of internet connectivity or prevent internet access for the new hardware. OK, here is the ProxMox VE installation link, you will need to install that first, before you can install firewall software:
https://www.proxmox.com/en/proxmox-ve/get-started
Tip for Naming Nodes / Host Name Example: ServerName.yourdomain.com
Once your first ProxMox node is installed and you can access the web GUI, it is time to install firewall / router software. Here again there are a lot of choices out there but we are recommending pfSense while mentioning that OPNsense might be an alternative to consider. We have used pfSense for many years and it is rock solid, there is a lot of online support and it is very reliable when virtualized in ProxMox. pfSense can handle the tasks of updating your dynamic IP address and providing DHCP services, it also has VPN support and strong firewall functions. The author of pfSense has even published the documentation we point you to on how to install pfSense on ProxMox:
https://www.pfsense.org/download/
Virtualizing pfSense on ProxMox
At this point you should have a working virtualized firewall. If you have been providing the machine internet from your existing router during setup, and it is now connected to your existing router using the WAN port, you should be able to access the internet with a computer connected to the LAN port. If that is the case then make copy of any changes to ports and other settings modifications you might have made to your existing router, then transfer them over to pfSense. When you are comfortable that all appropriate settings from your existing router have been duplicated in pfSense, it is time to swap in the new router. Power everything down and connect the new router directly to the modem or gateway, then power on and make sure everything comes up and you can get online, occasionally it is necessary to to refresh the WAN settings in pfSense if it is misbehaving after being connected to your old router during setup. Depending on your existing hardware you may need a network switch to get all your equipment hooked back up.
Before moving on, you might be wondering why did we virtualize the router software? It seems like it would be easier to just install pfSense on this machine and forget about virtualization. This will make more sense as we get further into the guide, but you will probably want to install a couple more applications on this machine once everything else is set up and working. Beyond that, the ability to easily backup and restore virtual machines makes it a better and safer alternative, you also want three machines in your cluster due to the way those machines interact with each other.
Main Server
Now it is time to work on the main, or more powerful of the two servers. Before this gets skipped over though, you probably want your router’s LAN port run directly to a hub, or main switching point. For this, we suggest a 16 or 24 port layer 2 switch, but I am mentioning it more because it is best to centralize as much as you can, verses jumping from switch to switch. You might also want to modify how your servers are configured based on your needs, but our suggested configuration will be adequate to host a fair number of applications. For this machine, we are aiming for maximum performance and minimal latency for our internet / public facing applications. This would mean devoting the best hardware you can afford to this machine, here are a few tips on that.
We always leaned toward using a commercial server in the past, and they are a great choice, but the price for well equipped new servers is up there and if you opt for a used machine even a couple generations old, the performance of newer consumer grade hardware is well above what you will end up with. There are possible downsides to this method, but to be honest, you are probably better off going with the best performance specifications you can and don’t worry too much about using commercial server hardware. With that in mind, the AMD Ryzen chips are worth a look, pair one up with 64 or 128G of memory and perhaps a 2 or 4TB SSD and you have a respectable server.
As with the firewall machine, if you use our suggestion, this node will be IP 10.0.10.2 and the subnet will be 255.0.0.0 or /8. The installation procedure for ProxMox VE is otherwise the same as the firewall machine, move on once you are able to access the web GUI:
https://www.proxmox.com/en/proxmox-ve/get-started
Second Server
In contrast to the main server, the plan is to set this one up as more of a workhorse and file server. Also unlike the main server, considering a commercial server a couple generations old may be a valid choice simply due to larger storage capabilities. The idea is to find a machine that can support at least 4 drives, 8 would leave plenty of room to expand down the road. Raw CPU power is not as important here, but I would still go with the fastest dual CPU rig you can afford, with 64 or 128G of memory to finish it off.
Configuration for this machine is a little different as well. Our example uses four drives, starting with a 1 or 2TB SSD as the main drive to install ProxMox, just like the other machines. The remaining drives can be installed now but will be set up later, in our example one is used for security video storage and the other two are configured as an array for NAS storage. Since those virtual machines have not yet been created we can take care of drive setup when we install and configure those services. You may have a better idea of your requirements, but three server quality 8TB HDD’s is a good start.
As with the previous machines, if you use our suggestion, this node will be IP 10.0.10.3 and the subnet will be 255.0.0.0 or /8. Move on when you can access the web GUI:
https://www.proxmox.com/en/proxmox-ve/get-started
Configure Updates & Create Cluster
At this point you should have three independent ProxMox nodes, one with your operational router and two that are a fresh install. Unless you have done some extra reading, you might be wondering why you are getting this “no valid subscription” warning. ProxMox is free to use, but in order to receive official support, you need a subscription. I think there is a hack to get rid of that box, but if I remember right, every time the software upgrades you need to apply the modification again. Speaking of upgrades, the default ProxMox installation comes with configuration files for updates / upgrades that only work if you have a subscription. To configure the repositories for use without the need for a subscription, ProxMox provides instructions here:
Repositories for Proxmox VE
Now we are ready to create a cluster and add all nodes to it:
Create Proxmox VE Cluster
Once complete, verify all nodes can be administered from any node web GUI.
Backup Server
Another advantage of using ProxMox VE as the Hypervisor is that ProxMox also provides software for a dedicated backup server. This solution integrates with your ProxMox VE cluster and provides all the features you would expect in a backup server, including the ability to act as a remote backup server. Our setup will use the ProxMox Backup Server for local daily backups though, and an alternate option to use one of the popular cloud services to store off-site backups will be outlined a bit later in the guide.
This machine does not need to be the most powerful in terns of CPU power, though it does need enough storage to comfortably hold all your backups. We currently use a single CPU low power commercial server, but as with the firewall machine, something using a modern i3 or similar CPU and 8 or 16G of memory will do the trick. This machine will need 2 drives, one small SSD (128~250GB) and another drive for storage, for the setup we have built, using an 8TB server grade HDD should be sufficient. The backup server will certainly allow the creation of a disc array and other options, but our system will have a secondary set of backups, so we considered that to be overkill.
The installation procedure for the backup server is very similar to the virtual environment, to leave room for a few more nodes, a suggested IP address for the backup server could be 10.0.10.10 with the same /8 subnet as everything else. As with the ProxMox nodes, you will also need to modify the ‘/etc/apt/sources.list’ file to activate the proper upgrade repositories when no subscription is in use. Once you have the backup server installed and integrated with the server cluster you are mostly done with the initial configuration and should have a operational server lab with a working router and backup server.
https://www.proxmox.com/en/proxmox-backup-server/get-started
Integrate ProxMox Backup Server with Proxmox VE
Repositories for the Proxmox Backup Server
Reverse Proxy & CertBot
If you plan to offer multiple applications over the internet, then you will almost certainly need a reverse proxy. In short, what a reverse proxy does in this situation is redirect traffic intended for a specific web application to the proper machine for that application, allowing any number of applications, websites or whatever to use the same primary connection (WAN IP). Our suggested reverse proxy server is Nginx, which when properly configured can handle your certificates (we use CertBot for this) and make the translation from standard http protocol on the local network, to ssl/https over the internet. The internet has countless examples on how to install and configure Nginx and CertBot, if you made it this far through our guide you will be able to work out the best way to handle a reverse proxy by doing a little searching easy enough, our only bit of advice is that we installed nginx on the firewall machine using a new virtual machine running Debian Linux and it works extremely well that way.
Web Services
After discussing a reverse proxy server, could we just skip over the main use case for that setup? The number of possible methods and applications that can be used to provide web services makes it a rough subject to cover in a generic guide. However, if you have not already started down this path, here is some information you might find helpful.
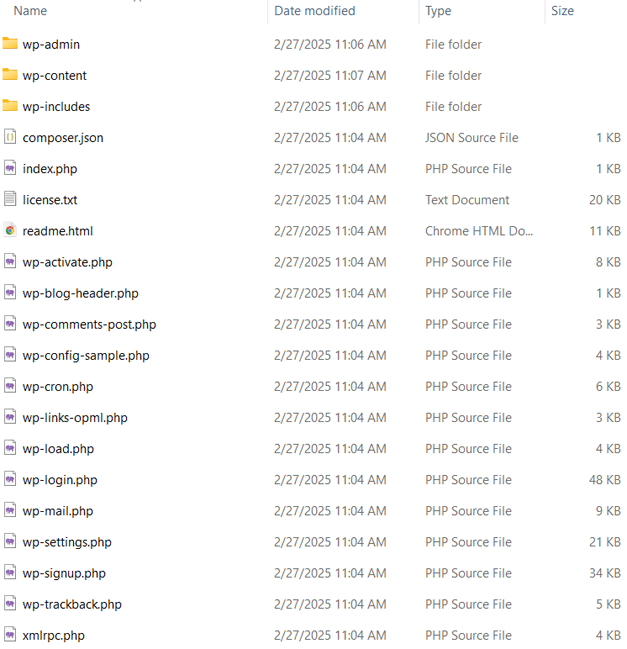
Since we do a lot of testing different applications, we have assembled some default servers that we simply clone when we want a new virtual machine, which is much quicker and easier than loading everything each time. This includes a LAMP stack (Linux / Apache / MariaDB – MySQL / PHP) built using APT, so all components stay up to date with current Debian repositories and as we make downline improvements to active applications, we also update the default versions with any applicable changes. Plenty of walkthroughs for installing a LAMP stack exist, so if interested in this method, a quick search will get you going.
Network Attached Storage (NAS)
A very popular application with nearly as many uses and possibilities as the server lab itself is a good NAS setup. For this we suggest TrueNAS, which will allow you to set up nearly any type of storage or file sharing arrangement you can imagine, you can even run applications from within TrueNAS. When we set up the hardware for our Second Server we reserved two 8TB drives to use as the storage pool for our NAS. We set those drives up in Linux and after getting the TrueNAS virtual machine running on that server, we created an array using those drives. Just as with Nginx, there is plenty of information on the internet about TrueNAS and how to configure storage, so we won’t go into that here.
TrueNAS is also how we push our backups to an off-site storage location. To get this working you need to set up a TrueNAS NFS in ProxMox that is enabled for backup storage, then enter cloud credentials for your cloud storage (we are currently using OneDrive for this) and create a task in TrueNAS to Sync with Cloud Storage.
Here is a article on doing the same thing with Google Drive:
https://www.truenas.com/docs/core/coretutorials/tasks/googledrivesync/
We also suggest installing NextCloud for TrueNAS which allows you to securely extend TrueNAS onto the internet for file sharing, cloud storage and more.
Security Cameras
Before finishing up, I will quickly talk about running a virtualized DVR system, since we did reserve storage on the Second Server for that purpose. We use Milestone XProtect Essential+ running on a Windows Server with the remaining 8TB HDD passed through to Windows as storage for the video database. This is somewhat outside of our intended scope, since even though the free version of XProtect in use, the application only runs on Windows, which is not a free product. Regardless, we have tried more than a few VMS offerings and so far we have not found another solution we are happy with.
Closing Information
You can go in so many different directions with what the server can do from here that it would be futile for us try and cover the possibilities. Here are some tips you may or may not find helpful though. ProxMox is built on Debian Linux, so we generally load Debian w/LXDE on the virtual machines we create, unless another operating system is required for that application. Those who enjoy using a GUI will find LXDE very friendly and in my opinion, maintaining your virtual machines through ProxMox with the option to use a GUI is often preferred to doing it all through the command line or SSH connection. Ubuntu is also Debian based (.deb), so in most cases if you are comfortable with Ubuntu, there is not much difference and one can usually be used in place of the other. ProxMox can host any operating system though, so this is just the way we found things work best for us.